How to Replace Parts in Dash Miner D9?
The Dash Miner D9 is a state-of-the-art mining device designed by Antminer, specifically engineered to mine Dash cryptocurrency using the X11 algorithm. Known for its high efficiency, reliability, and user-friendly design, the D9 is a popular choice among mining operators. However, like any piece of hardware, it may occasionally require maintenance or part replacement to ensure optimal performance. In this guide, we’ll walk you through the process of replacing parts in the Dash Miner D9, offering practical insights and tips to keep your mining operations running smoothly.
Understanding the Dash Miner D9: A Quick Overview
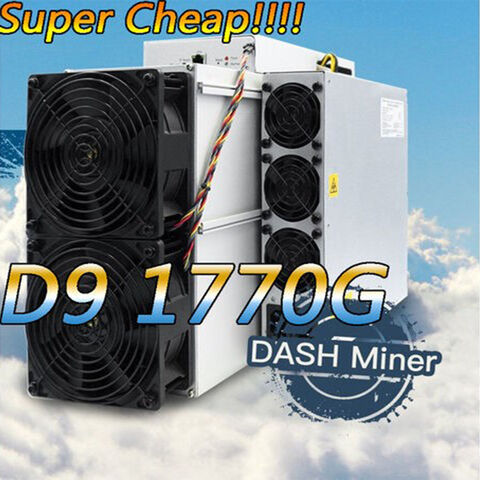
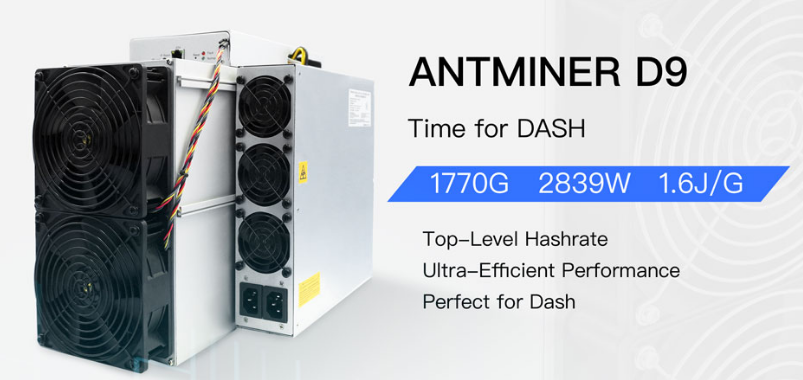
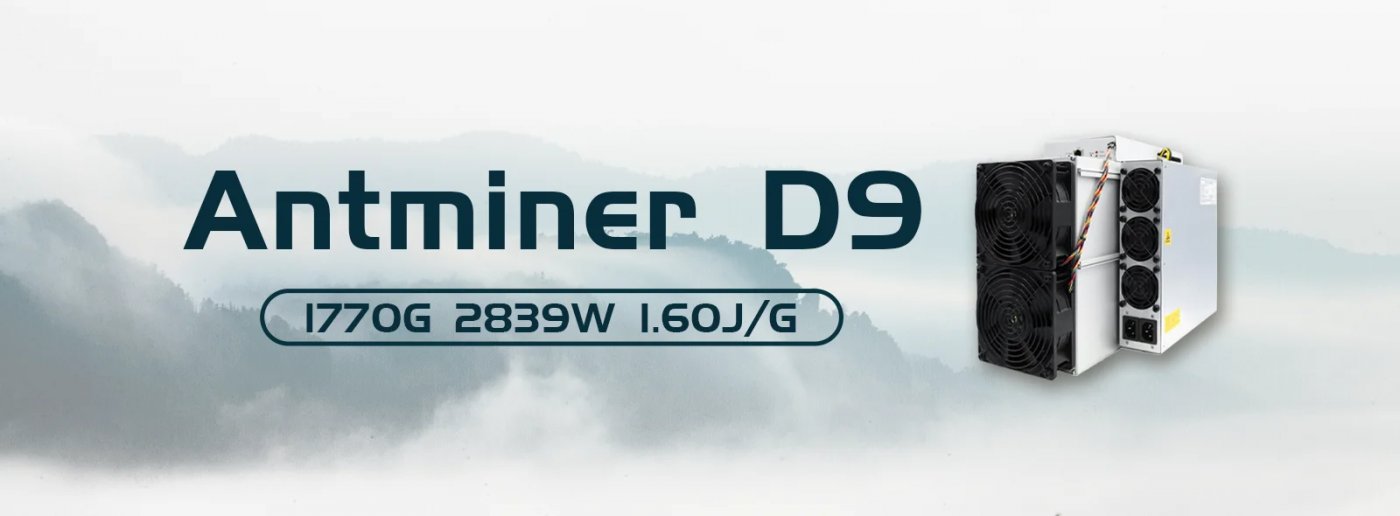
Before diving into part replacement, it’s essential to familiarize yourself with the Dash Miner D9’s design and components. The miner features three robust hash boards powered by 378 high-performance hash chips, delivering a hashrate of 1770 GH/s. Its efficient cooling system ensures quiet operation (70 dBA), while its compact design (400mm x 195.5mm x 290mm) makes it suitable for various mining setups.
The D9 is built for durability, but certain components—such as fans, hash boards, and power supplies—may require replacement over time due to wear and tear. Regular maintenance can extend the lifespan of your miner and maximize its profitability.
Common Parts That May Need Replacement
- Fans:
The Dash Miner D9 relies on fans to maintain optimal operating temperatures. Over time, fans can wear out or fail, leading to overheating and reduced performance. Replacing fans promptly is crucial to prevent damage to other components.
- Hash Boards:
Hash boards are the core of your miner’s computational power. While Antminer products are known for their reliability, hash boards can occasionally fail due to electrical issues or prolonged use.
- Power Supply Units (PSUs):
The PSU converts AC power into the DC power required by the miner. A faulty PSU can lead to inconsistent performance or complete downtime.
- Control Boards:
The control board acts as the miner’s brain, managing communication between components. Issues with the control board can disrupt mining operations.
- Cables and Connectors:
Damaged cables or connectors can cause power delivery issues or connectivity problems. Regular inspection is recommended.
Step-by-Step Guide to Replacing Parts in the Dash Miner D9
1. Preparation
Before starting any repair work, ensure you have the following tools and materials:
- A set of precision screwdrivers
- Anti-static wrist strap (to protect sensitive components)
- Replacement parts (ensure compatibility with the D9)
- Compressed air or a soft brush (for cleaning)
Always power off and unplug the miner before performing any maintenance.
2. Replacing Fans
Fans are among the most frequently replaced components in mining rigs. Here’s how to replace them in the Dash Miner D9:
- Remove the Miner’s Casing: Use a screwdriver to unscrew the casing and access the internal components.
- Locate the Faulty Fan: Identify the fan that needs replacement (usually indicated by noise or reduced airflow).
- Disconnect the Fan Cable: Carefully unplug the fan’s power cable from the control board.
- Remove the Old Fan: Unscrew the fan from its mounting bracket.
- Install the New Fan: Secure the new fan in place and reconnect the power cable.
- Reassemble the Miner: Replace the casing and power on the miner to test the new fan.
3. Replacing Hash Boards
Hash board replacement requires precision and care:
- Open the Miner: Remove the casing to access the hash boards.
- Identify the Faulty Board: Use the miner’s interface to identify which board is malfunctioning.
- Disconnect the Board: Carefully unplug the cables connecting the hash board to the control board and power supply.
- Remove the Board: Unscrew the hash board from its mounting bracket.
- Install the New Board: Secure the new hash board in place and reconnect all cables.
- Test the Miner: Power on the miner and monitor its performance to ensure the new board is functioning correctly.
4. Replacing Power Supply Units (PSUs)
A faulty PSU can bring your mining operations to a halt. Follow these steps to replace it:
- Power Off the Miner: Ensure the miner is completely unplugged.
- Disconnect the PSU: Unplug all cables connecting the PSU to the miner.
- Remove the Old PSU: Unscrew the PSU from its mounting bracket.
- Install the New PSU: Secure the new PSU in place and reconnect all cables.
- Test the Miner: Power on the miner and verify that the new PSU is delivering stable power.
5. Replacing Control Boards
Control board issues are rare but can significantly impact mining operations:
- Access the Control Board: Remove the miner’s casing to access the control board.
- Disconnect the Board: Carefully unplug all cables connected to the control board.
- Remove the Old Board: Unscrew the control board from its mounting bracket.
- Install the New Board: Secure the new control board in place and reconnect all cables.
- Test the Miner: Power on the miner and verify that it is functioning correctly.
6. Replacing Cables and Connectors
Damaged cables can cause connectivity issues:
- Inspect Cables: Identify any frayed or damaged cables.
- Disconnect the Old Cable: Unplug the damaged cable from its connector.
- Install the New Cable: Connect the new cable securely.
- Test the Connection: Power on the miner and ensure the issue is resolved.
Tips for Maintaining Your Dash Miner D9
- Regular Cleaning: Dust buildup can reduce cooling efficiency. Clean the miner regularly using compressed air or a soft brush.
- Monitor Performance: Use the miner’s interface to monitor performance metrics and identify potential issues early.
- Keep Spare Parts on Hand: Having spare fans, cables, and other components can minimize downtime.
- Ensure Proper Ventilation: Place the miner in a well-ventilated area to prevent overheating.
- Stay Updated: Follow Antminer’s official channels for firmware updates and maintenance tips.
Why Choose Dash Miner D9?
The Dash Miner D9 stands out for its unmatched reliability, efficient power management, and user-friendly design. Its compatibility with a wide range of power infrastructures and advanced cooling system make it a versatile choice for both residential and commercial mining setups. Additionally, Antminer’s comprehensive 180-day warranty and Minerfixes’ global logistics support ensure peace of mind for operators.
Conclusion
Replacing parts in the Dash Miner D9 is a straightforward process when you follow the right steps and precautions. Regular maintenance and timely part replacement can significantly extend the lifespan of your miner and ensure consistent performance. Whether you’re a seasoned mining operator or a beginner, understanding how to maintain your Dash Miner D9 is essential for maximizing profitability and staying ahead in the competitive world of cryptocurrency mining.
Invest in the Dash Miner D9 today, and equip yourself with the tools and knowledge to keep your mining operations running at peak efficiency. Happy mining!