Dash Miner D9 Installation Step-by-Step Guide
Cryptocurrency mining has evolved significantly over the years, and the Dash Miner D9 from Antminer is a testament to this progress. Designed specifically for the X11 algorithm, this mining rig is a powerhouse for Dash mining, offering unparalleled efficiency, reliability, and ease of use. Whether you’re a seasoned mining operator or a newcomer to the field, this step-by-step guide will walk you through the installation process, ensuring you get the most out of your Dash Miner D9.
Product Introduction
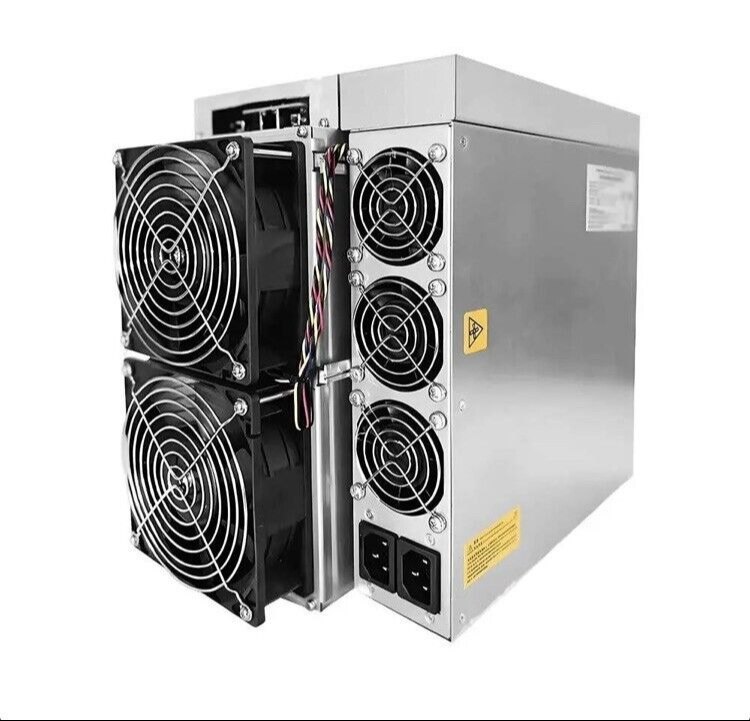
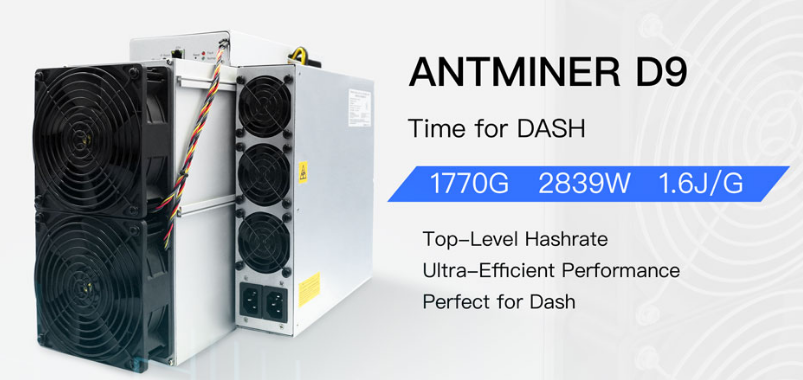
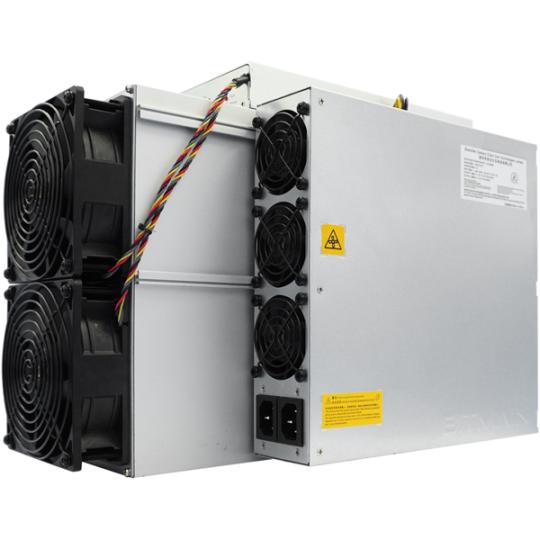
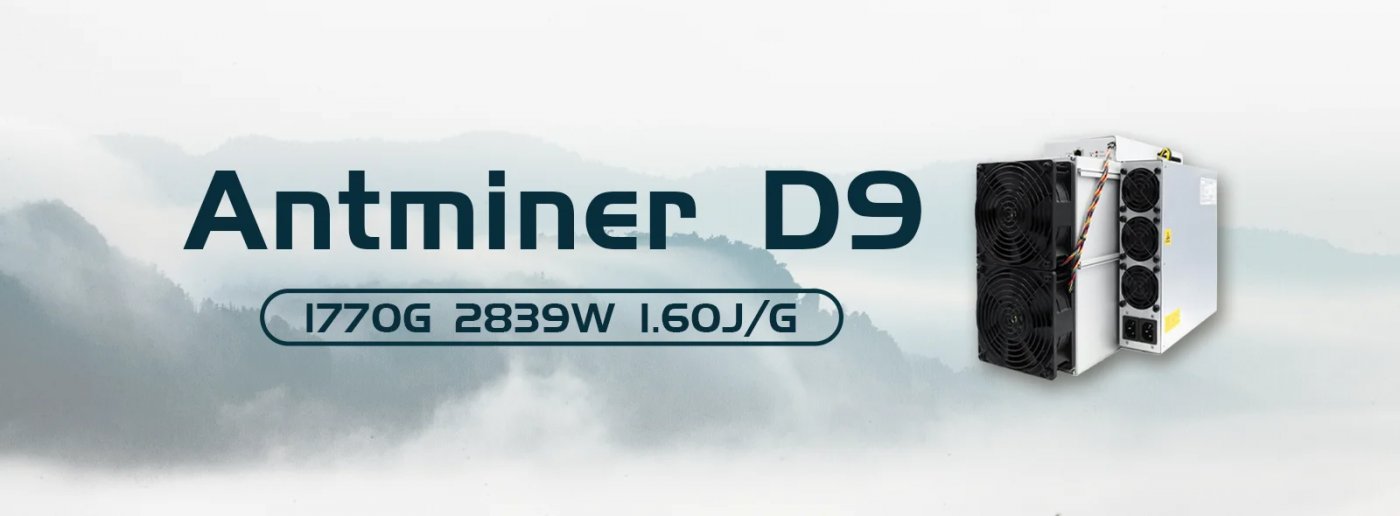
The Dash Miner D9 is a state-of-the-art mining solution engineered by Antminer, a brand synonymous with quality and innovation in the crypto mining industry. With a hashrate of 1770 GH/s and an energy efficiency of just 1.60 J/GH, the D9 is designed to maximize profitability while minimizing operational costs. Its compact design, quiet operation, and robust cooling system make it suitable for both home and commercial setups. Additionally, the miner comes with a 180-day warranty and global support, ensuring peace of mind for users.
Step 1: Unboxing and Initial Setup
Before diving into the installation process, ensure you have all the necessary components. The Dash Miner D9 package includes:
- The Dash Miner D9 unit
- Power supply cables
- Ethernet cable
- User manual
Start by carefully unboxing the miner and inspecting it for any visible damage during transit. Position the miner in a well-ventilated area with adequate space for airflow. The compact dimensions (400mm x 195.5mm x 290mm) make it easy to integrate into existing setups.
Step 2: Connecting the Power Supply
The Dash Miner D9 operates on a 200-240V AC power supply and consumes approximately 2839 watts. Follow these steps to connect the power:
- Ensure your power outlet meets the miner’s voltage requirements (200-240V).
- Connect the power supply cables securely to the miner’s power input ports.
- Plug the other end of the cables into the power outlet.
*Pro Tip*: Use a surge protector to safeguard your miner from voltage fluctuations, which can cause hardware damage.
Step 3: Network Configuration
The Dash Miner D9 connects to your mining pool via an Ethernet cable. Here’s how to set up the network:
- Connect one end of the Ethernet cable to the miner’s RJ45 port and the other end to your router or network switch.
- Power on the miner and wait for it to boot up.
- Access the miner’s user interface by entering its IP address into a web browser. You can find the IP address using a network scanning tool or by checking your router’s connected devices list.
Step 4: Configuring Mining Settings
Once you’ve accessed the user interface, it’s time to configure the mining settings:
- Log in using the default credentials (usually “root” for both username and password).
- Navigate to the “Miner Configuration” tab.
- Enter the details of your mining pool, including the URL, port number, and worker credentials.
- Save the settings and restart the miner to apply the changes.
*Pro Tip*: Choose a reliable mining pool with low latency and competitive fees to maximize your earnings.
Step 5: Monitoring and Optimization
The Dash Miner D9’s intuitive interface allows you to monitor its performance in real-time. Key metrics to track include:
- Hashrate: Ensure the miner is operating at or near its advertised 1770 GH/s.
- Temperature: Keep an eye on the temperature to avoid overheating (optimal range: 0°C to 40°C).
- Fan speed: Adjust fan settings if necessary to maintain efficient cooling.
*Pro Tip*: Regularly clean the miner’s fans and vents to prevent dust buildup, which can affect performance.
Product Advantages
1. Unmatched Reliability and Support
The Dash Miner D9 is backed by Antminer’s 180-day warranty, ensuring your investment is protected. In the rare event of a malfunction, BITMAIN covers shipping costs for replacements, minimizing downtime.
2. Efficient Power Management
With an energy efficiency of 1.60 J/GH, the D9 reduces electricity costs, making it one of the most cost-effective miners for Dash.
3. Compact and Quiet Operation
The miner’s compact design and advanced cooling system ensure it operates quietly (70 dBA), making it suitable for home use.
4. Easy Maintenance
The D9 is designed for hassle-free maintenance, with readily available spare parts and user-friendly repair processes.
5. Global Accessibility
Minerfixes provides seamless global logistics support, ensuring your miner reaches you safely, no matter where you are.
Troubleshooting Common Issues
Even with a reliable miner like the D9, occasional issues may arise. Here are some common problems and their solutions:
- Miner Not Powering On
- Check the power supply connections and ensure the outlet is functioning.
- Verify that the voltage matches the miner’s requirements.
- Low Hashrate
- Ensure the miner is properly cooled and not overheating.
- Check for software updates or firmware issues.
- Network Connectivity Issues
- Restart the router and miner.
- Verify the mining pool settings are correct.
Conclusion
The Dash Miner D9 is a game-changer for anyone looking to venture into Dash mining or upgrade their existing setup. Its combination of high performance, energy efficiency, and user-friendly design makes it a top choice for mining operators worldwide. By following this step-by-step guide, you can seamlessly install and optimize your D9, unlocking the full potential of the X11 algorithm.
Invest in the Dash Miner D9 today and position yourself at the forefront of the cryptocurrency mining revolution. With Antminer’s trusted reputation and Minerfixes’ global support, you’re not just buying a miner—you’re securing a reliable partner for your mining journey. Happy mining!