Dash Miner D9 Installation in a Home Mining Rig: A Practical Guide
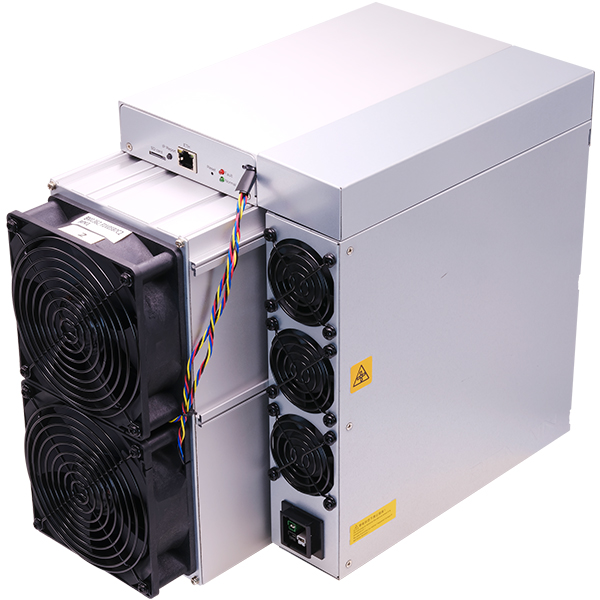
The Dash Miner D9, a cutting-edge mining solution from the renowned Antminer brand, has quickly become a favorite among cryptocurrency enthusiasts and mining operators. Designed specifically for mining Dash using the X11 algorithm, this powerful device offers unparalleled performance, efficiency, and reliability. Whether you’re a seasoned miner or a newcomer to the crypto mining world, installing the Dash Miner D9 in your home mining rig can be a game-changer.
In this article, we’ll walk you through the practical steps of setting up the Dash Miner D9 in a home environment. We’ll explore its features, advantages, and operational nuances, ensuring you get the most out of this exceptional mining device.
Why Choose the Dash Miner D9?
Before diving into the installation process, it’s essential to understand why the Dash Miner D9 stands out in the competitive world of cryptocurrency mining.
1. Exceptional Hashrate and Efficiency
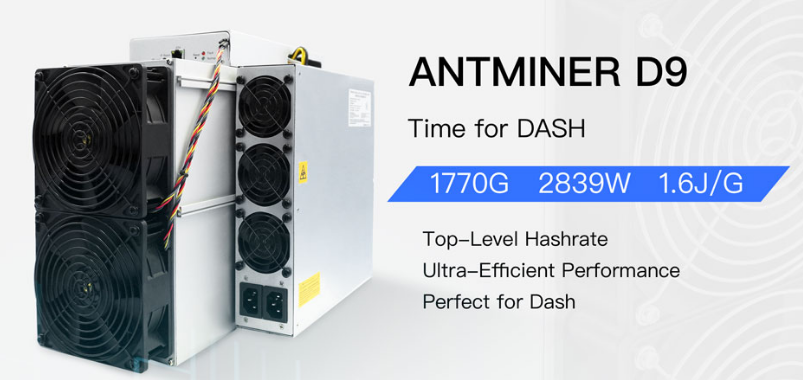
The Dash Miner D9 boasts an impressive hashrate of 1770 GH/s, making it one of the most powerful miners for the X11 algorithm. Its advanced architecture ensures optimal power efficiency, consuming just 1.60 J/GH at 25°C. This means you can maximize your mining output while minimizing electricity costs—a critical factor for home miners.
2. Compact and Quiet Design
Unlike many high-performance miners that are bulky and noisy, the Dash Miner D9 is designed with home users in mind. Its compact dimensions (400mm x 195.5mm x 290mm) and low noise levels (70 dBA at 25°C) make it ideal for home setups, where space and noise are often concerns.
3. Reliable and User-Friendly
Antminer’s reputation for reliability shines through in the Dash Miner D9. Its robust construction ensures stable operation, even in challenging conditions. Additionally, the intuitive user interface, accessible via Ethernet, allows for seamless monitoring and control of your mining operations.
4. Comprehensive Warranty and Support
The Dash Miner D9 comes with a 180-day warranty, providing peace of mind for your investment. In the unlikely event of a malfunction, Antminer covers shipping costs for a replacement, minimizing downtime and ensuring uninterrupted mining.
Preparing for Installation
1. Assess Your Power Supply
The Dash Miner D9 operates on a 200-240V AC power supply and consumes approximately 2839 watts. Before installation, ensure your home’s electrical system can handle this load. It’s recommended to use a dedicated circuit to avoid overloading your existing setup. Additionally, invest in a high-quality power supply unit (PSU) that meets the miner’s requirements.
2. Choose the Right Location
Proper placement is crucial for optimal performance and longevity. Select a well-ventilated area with adequate airflow to prevent overheating. Ideally, the temperature should remain between 0°C and 40°C, and humidity levels should stay within 10% to 90% (non-condensing). Avoid placing the miner near flammable materials or in damp environments.
3. Set Up a Mining Pool
Before firing up the Dash Miner D9, you’ll need to join a mining pool. Mining pools allow you to combine computational power with other miners, increasing your chances of earning rewards. Popular Dash mining pools include AntPool, F2Pool, and ViaBTC. Once you’ve chosen a pool, create an account and obtain your mining address.
Step-by-Step Installation Guide
1. Unbox and Inspect the Miner
Carefully unpack the Dash Miner D9 and inspect it for any visible damage during transit. Ensure all components, including the power cord and Ethernet cable, are included.
2. Connect to Power
Using the provided power cord, connect the Dash Miner D9 to your PSU or wall outlet. Double-check that the voltage matches the miner’s requirements (200-240V).
3. Establish Network Connectivity
Connect the miner to your home network using the Ethernet cable. This allows you to access the miner’s web interface for configuration and monitoring.

4. Access the Miner’s Interface
Open a web browser and enter the miner’s IP address (you can find this in your router’s connected devices list). Log in using the default credentials, which are usually “admin” for both username and password.
5. Configure Mining Settings
In the miner’s interface, navigate to the “Miner Configuration” section. Enter your mining pool’s address, along with your worker username and password. Save the settings and restart the miner to apply the changes.
6. Monitor Performance
Once the miner is up and running, use the interface to monitor its performance. Key metrics to track include hashrate, temperature, and fan speed. Regular monitoring helps identify potential issues early, ensuring smooth operation.
Operational Tips for Home Mining
1. Optimize Cooling
Although the Dash Miner D9 is designed for efficient cooling, additional measures can further enhance its performance. Consider using external fans or placing the miner near an open window to improve airflow. Avoid blocking the miner’s vents or exhaust fans.
2. Minimize Noise
While the Dash Miner D9 is relatively quiet, its cooling fans can generate noticeable noise. To reduce this, place the miner in a soundproof enclosure or a separate room. Ensure the enclosure has adequate ventilation to prevent overheating.
3. Regular Maintenance
Periodically clean the miner’s fans and vents to prevent dust buildup, which can affect cooling efficiency. Additionally, inspect the power cord and Ethernet cable for wear and tear, replacing them if necessary.
The Advantages of Home Mining with Dash Miner D9
1. Cost-Effective Mining
With its high efficiency and low power consumption, the Dash Miner D9 allows you to mine Dash profitably, even in a home setup. Its compact design also saves space, eliminating the need for expensive infrastructure.
2. Flexibility and Scalability
The Dash Miner D9’s compatibility with various power infrastructures makes it easy to integrate into different environments. As your mining operations grow, you can add more units to scale your setup seamlessly.
3. Accessible Support and Repairs
Antminer’s global support network ensures you’re never left stranded. In case of any issues, spare parts are readily available, and Minerfixes offers comprehensive repair services to minimize downtime.
Conclusion: Unlock Your Mining Potential
The Dash Miner D9 is a powerhouse that combines cutting-edge technology with user-friendly design, making it an ideal choice for home mining rigs. By following this practical guide, you can set up and optimize your Dash Miner D9 with confidence, positioning yourself for success in the competitive world of cryptocurrency mining.
Whether you’re mining for financial gain or simply exploring the fascinating world of cryptocurrencies, the Dash Miner D9 offers unmatched reliability, efficiency, and performance. Invest in this exceptional mining device today and take your mining operations to the next level!