How to Install JASMINER X16-Q Pro in a 3U Server Rack?
Cryptocurrency mining has evolved into a sophisticated industry where efficiency, reliability, and scalability are paramount. The JASMINER X16-Q Pro emerges as a standout solution, offering enterprise-level performance with unmatched energy efficiency. This article provides a comprehensive guide on how to install the JASMINER X16-Q Pro in a 3U server rack, ensuring optimal performance and seamless integration into your mining operation.
Understanding the JASMINER X16-Q Pro
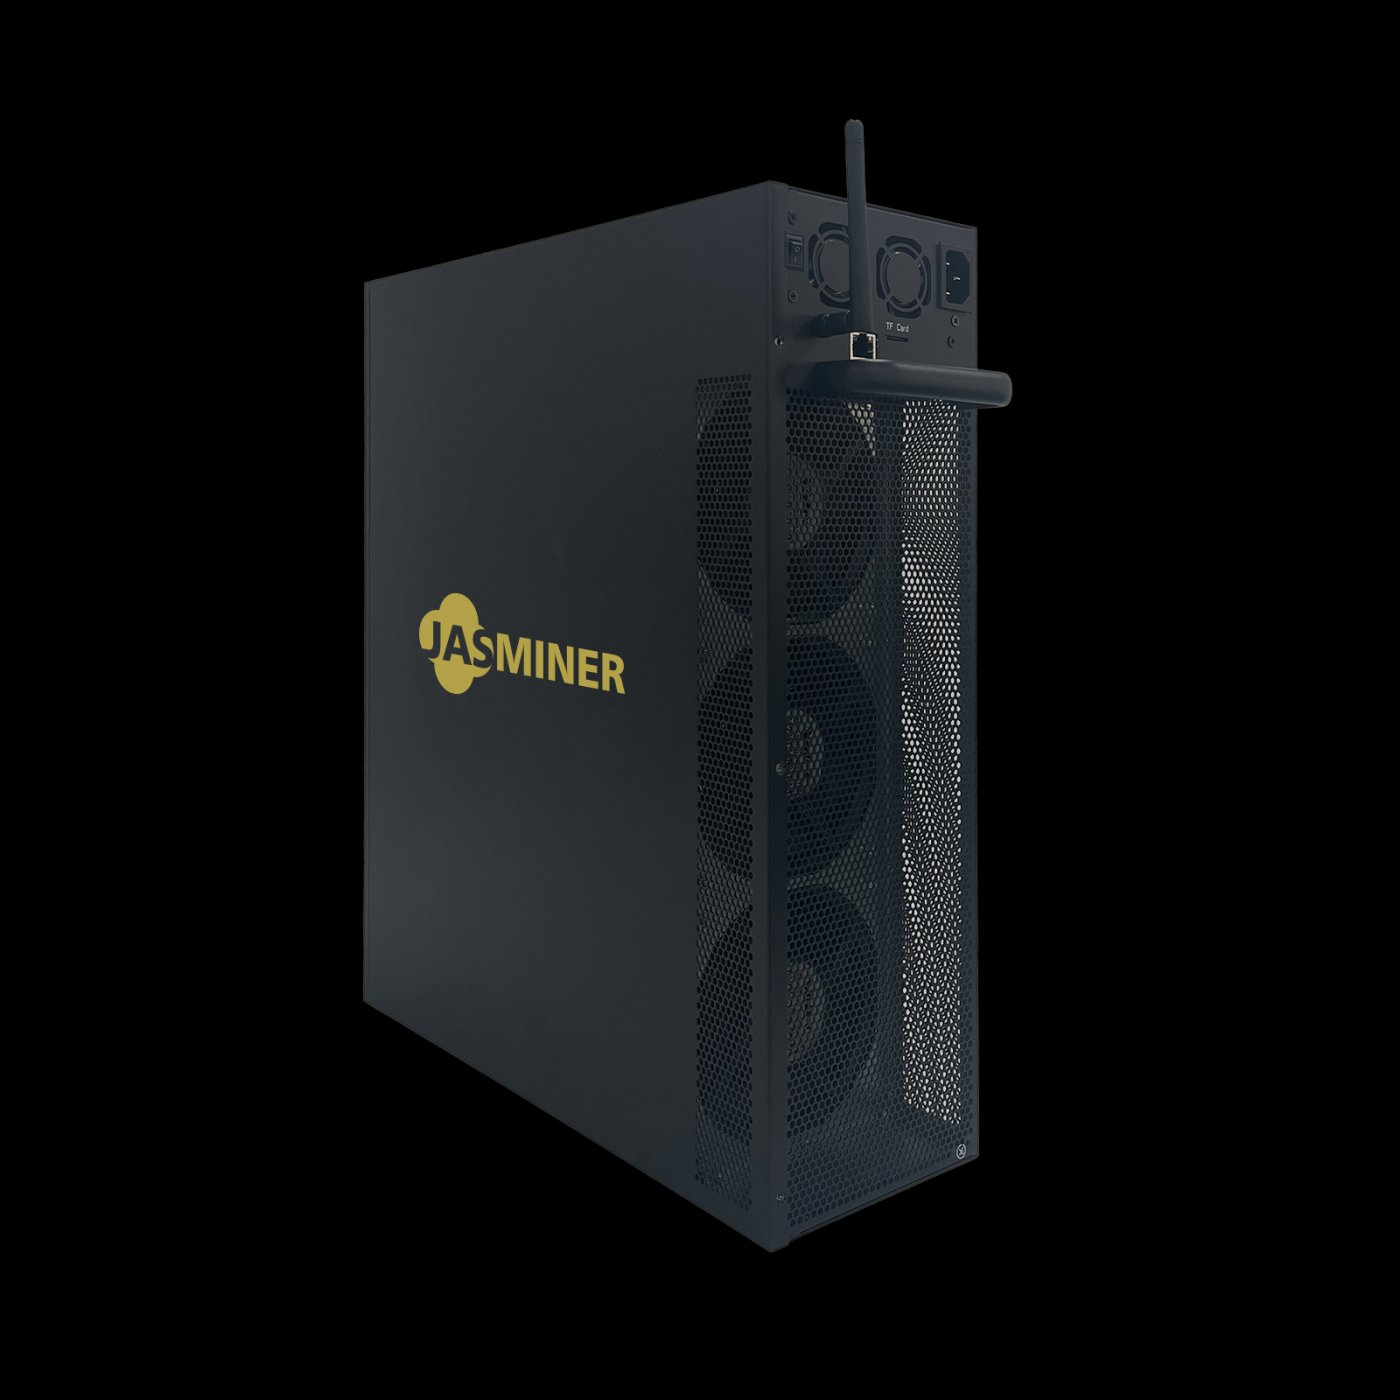
Before diving into the installation process, it’s essential to understand what makes the JASMINER X16-Q Pro a top-tier mining solution. Designed for both institutional miners and advanced home setups, this device boasts a triple-chip architecture that delivers an impressive hash rate of 2050MH/s (±10%) while maintaining a groundbreaking power efficiency ratio of 0.25J/MH. Its 8GB high-speed memory ensures robust performance, and its advanced thermal management system keeps it operating smoothly across a wide temperature range (0-40°C) with minimal noise (≤40dB).
The JASMINER X16-Q Pro is built in a standard 3U server form factor (445mm×132.5mm×443mm), making it compatible with professional mining facilities. Its universal power input (110-240V) and dual networking options (Gigabit Ethernet and WiFi) further enhance its versatility.
Preparing for Installation
1. Assess Your Setup
Before installation, ensure your server rack meets the requirements for the JASMINER X16-Q Pro. Verify the available space, power supply, and cooling infrastructure. A standard 3U server rack should have sufficient depth and airflow to accommodate the device.
2. Gather Tools and Equipment
You’ll need the following tools:
- Screwdrivers (Phillips and flathead)
- Mounting screws (typically included with the server rack)
- Power cables and network cables (Ethernet or WiFi adapter)
- Anti-static wrist strap (to protect sensitive components)
3. Safety Precautions
- Ensure the power supply is turned off before installation.
- Use an anti-static wrist strap to prevent damage to the device.
- Verify that the server rack is stable and securely anchored.
Step-by-Step Installation Guide
Step 1: Position the Server Rack
Place the server rack in a location with adequate ventilation and access to power outlets. Ensure the rack is level and stable to prevent vibrations that could affect performance.
Step 2: Prepare the 3U Slot
Open the server rack and identify the 3U slot where the JASMINER X16-Q Pro will be installed. Remove any blank panels or obstructions from the slot.
Step 3: Secure the Rails
If your server rack uses sliding rails, attach them to the sides of the 3U slot. Ensure the rails are aligned and securely fastened using the provided screws.
Step 4: Install the JASMINER X16-Q Pro
Carefully lift the JASMINER X16-Q Pro and align it with the rails or mounting brackets. Slide the device into the 3U slot until it clicks into place. Secure it using the mounting screws provided with the server rack.

Step 5: Connect Power and Networking
Plug the power cable into the JASMINER X16-Q Pro and connect it to a reliable power source. For networking, choose either the Gigabit Ethernet port or configure the WiFi connection based on your setup.
Step 6: Verify Airflow and Cooling
Ensure that the device’s cooling system has adequate airflow. The JASMINER X16-Q Pro’s advanced cooling fans and grille design are optimized for efficient heat dissipation, but proper rack ventilation is crucial for long-term performance.
Step 7: Power On and Test
Turn on the power supply and boot up the JASMINER X16-Q Pro. Use the monitoring software to verify that the device is functioning correctly and delivering the expected hash rate.
Practical Tips for Optimal Performance
- Maximize Airflow: Position the server rack in a cool, well-ventilated area. Consider adding additional fans or cooling systems if necessary.
- Monitor Power Consumption: Use a power meter to track energy usage and ensure it aligns with the device’s specifications.
- Regular Maintenance: Clean the device and server rack periodically to prevent dust buildup, which can affect cooling efficiency.
- Firmware Updates: Keep the JASMINER X16-Q Pro’s firmware up to date to benefit from performance enhancements and bug fixes.
Why Choose the JASMINER X16-Q Pro for Your Mining Operation?
The JASMINER X16-Q Pro stands out for its combination of performance, efficiency, and reliability. Its industry-leading hash rate and revolutionary power efficiency make it a cost-effective choice for both large-scale operations and individual miners. The device’s compact 3U form factor allows for efficient space utilization, while its advanced cooling system ensures consistent performance in diverse environments.

For mining operators seeking a sustainable and profitable solution, the JASMINER X16-Q Pro offers future-proofing with its robust design and simplified maintenance requirements. Whether you’re setting up a new mining facility or upgrading an existing one, this device delivers the practical value and genuine utility needed to stay competitive in the cryptocurrency mining industry.
Conclusion
Installing the JASMINER X16-Q Pro in a 3U server rack is a straightforward process that unlocks the full potential of this cutting-edge mining solution. By following the steps outlined in this guide, you can ensure a smooth setup and maximize the device’s performance. With its unmatched efficiency, versatile design, and professional-grade build quality, the JASMINER X16-Q Pro is an investment that promises long-term returns for your mining operation.